Showing posts with label Photoshop. Show all posts

Thursday, October 13, 2011

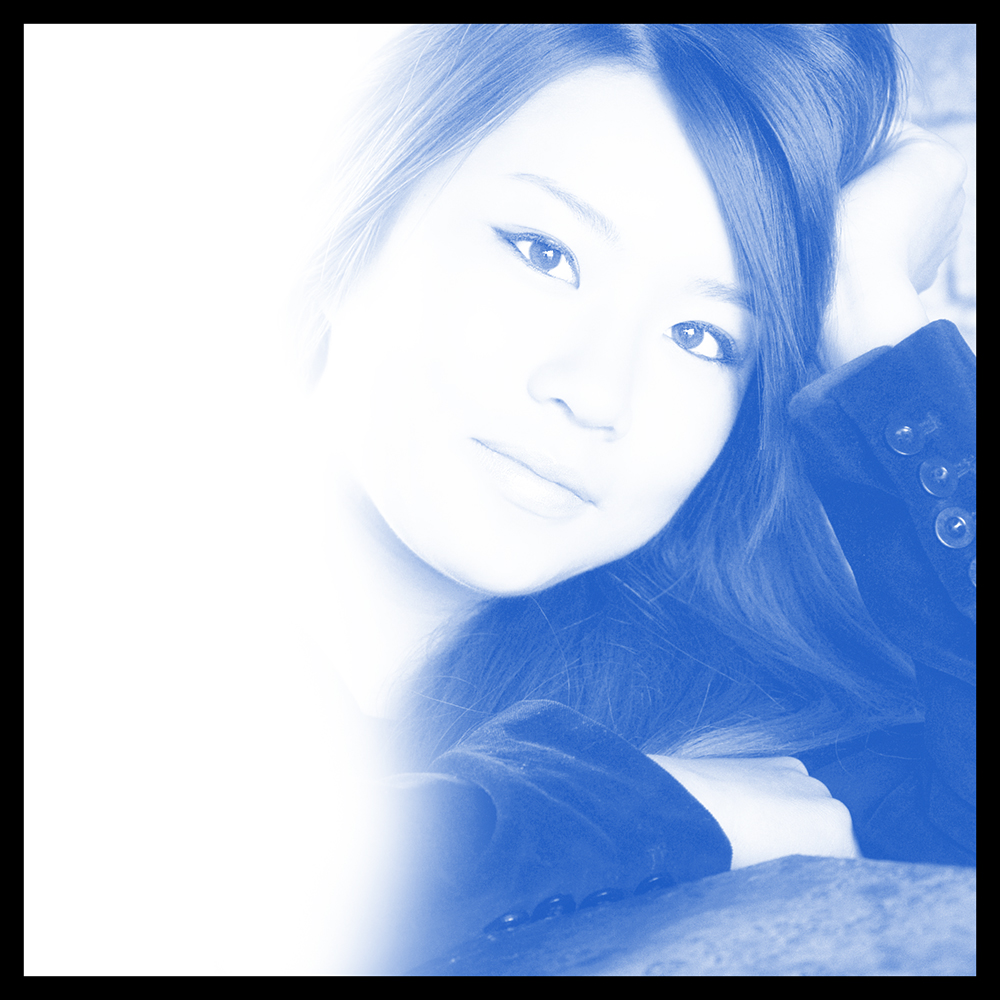
Another image style using channels

This post is a slight deviation from my previous post with a different end result. For simplicity I will start at the beginning again.

1. Open your image in Photoshop.
2. Click the Channels Tab.


3. Hold down the CTRL key and single click on the RGB channel, this will load the luminosity as a selection.
4. Press the "Create New Channel" icon on the bottom of the Channels dialog - this will create a new Channel "Alpha 1".
5. Set your background colour to white and press CTRL+DEL a few times to fill the selection with white.
6. Select your brush tool and set your foreground colour to White.
7. Press CTRL+D to deselect the selection.
8. Paint white on all the areas you would like to be white in the final image.


9. Press CTRL+I to invert the channel and then double click on it to load it as a selection.


10. Select the Marque Tool from the toolbox and with the Alpha Channel selected move the selection into the new document where you want the background (you can move it when the little rectangle is displayed).

11. Create a new Layer and select a foreground colour you would like to use, I'm using a dark blue. Press ALT+DEL to fill the selection with the colour.

Wednesday, October 12, 2011

Create a High-Key Page Background

Here is a nice technique for creating a faded image for a background. This technique can be used in design when you want an image to break up a boring background or for any other reason you can think of really..

1. Open your image in Photoshop.
2. Click the Channels Tab.


3. Hold down the CTRL key and single click on the RGB channel, this will load the luminosity as a selection.
4. Press the "Create New Channel" icon on the bottom of the Channels dialog - this will create a new Channel "Alpha 1".
5. With the new Channel "Alpha 1" selected white as your background colour and press CTRL+DEL a few times to fill the selection with white.
6. CTRL+click on the Alpha Channel to load it as a selection.


7. Select the Move Tool from the toolbox and with the Alpha Channel selected move the selection into the new document where you want the background.


7 . This can also be refined a little and can produce a very nice looking black and white image by playing around with Levels or Curves.


Wednesday, October 5, 2011

Removing Colour Cast with LAB Colour Mode


LAB Colour mode is a great way to fix a color cast and/or to adjust the luminance in an image.
Follow this step by step guide to try it out.

1. Open your image in Photoshop.
2. Duplicate the image by clicking the Image menu - Duplicate
3. Convert the image to LAB Colour by clicking the Image menu - Mode - LAB Colour
4. If your layers panel is not displayed press F7 to display it.
5. Add a new adjustment layer by clicking the Layers menu - New Adjustment Layer - Levels.

6 . You will see 3 options in the levels dialog - Lightness, a, b

Just a quick Note, I find it helps to start with an end goal in mind before playing with the colours.
  • Lightness - This option does not control the colour but is used to change alter the luminosity in an image. Dragging the slider on the far left (your left) in makes the blacks lighter. Dragging the slider on far right (your right) in makes the whites lighter. Dragging the central slider to the left makes the midpoint darker and to the right makes the midpoint brighter.
  • a (Red - Green) - This option adjusts the Red - Green channels within an image and operates on the same principle as the Lightness Slider above.
  • b (Blue - Yellow) - This option adjusts the Blue - Yellow channels within an image and operates on the same principle as the Lightness Slider above.
7. Once happy with the colour and luminosity changes flatten the image by clicking the Layer menu - Flatten Image.
8. Change the image back to RGB Colour by clicking the Image menu - Mode - RGB Colour
9. At the point I select the whole image, copy it and paste as a new layer in my original as I may reduce the opacity of the LAB adjustment.

Thursday, September 2, 2010

Removing Global Colour Casts

Here is a really quick tip I have just discovered for removing colour casts from a image.
1. Open your image in Photoshop and press F7.
2. Copy your layer.
3. From the Filter menu select Average, this will give you the average colour of your image.
4. Change the Blend Mode of the layer to Colour.
5. From the Image menu select Adjustment/Invert, this will give you the opposite colour.
6. Simply reduce the opacity of your colour layer until you get a colour you are happy with.

Friday, April 2, 2010

Two for One Grunge Frames in Photoshop.

This is a great technique for adding an Grunge Frame effect to an image using Photoshop's Blend Modes. I have created the Grunge Frame used in this example and have provided it for free download below. These Grunge Frames can be anything, you can buy them or create your own like I did. You can create them in Photoshop, draw them and scan them or take pictures of textures, it really doesn't matter. The point is they can be anything once they are converted to be a black and white file.

If the file is not one you have created, then when you bring it into photoshop you need to set you white and black points on the file. To do this you need to click Image/Adjustments/Levels from the menu bar.


To set the black point click your Black Point dropper.


Select and click on a part of the Grunge Frame you want to be black.
To set the white point click your White Point dropper.


Select and click on a part of the Grunge Frame you want to be white.

Once you have your Grunge Frame ready for use you press CTRL+A to select it. CTRL+C to copy it.
Open the image you wish to use the edge file on and once it opens in photoshop paste the Grunge Frame on top of the image by pressing CTRL+V.


If the Grunge Frame is too small or too large for the image underneath then we need to change the size of the edge file. To do this press CTRL+T to bring up the free transform tool. Then drag the handles of the Grunge Frame to cover the whole of the image file. Once you get it the way you want press Enter on your keyboard.


Now all we need to change is the blend mode of the top layer to display our image underneath. As the primary colour of the Grunge File is black we want everything that is black to be ignored from the top layer. To do this select the Screen Blend Mode.


When the Blend Mode is Changed to Screen.


Pretty Cool!

But what if we want black out the outside the what on the inside? Well its very easy. Select everything in the upper layer (our edge layer) by pressing CTRL+A on the keyboard. When everything is selected press CTRL+I on the keyboard.


Again we are going to change the Blend Mode of the upper layer to ignore the white letting the image underneath appear. Set the Blend Mode of the upper layer to Multiply.


So there you have it. With every Grunge Frame you create you get one for Free, just invert the layer the change the blend mode, it couldn't be easier.

Click Here to download your free High Res Grunge Frame.


Article including images copyright of Gerard Foy Photography.
www.gerardfoy.com

Monday, March 29, 2010

Fixing Blown Highlights in Photoshop

Recovering lost highlight detail is virtually impossible in Photoshop. Here is a handy little technique to recover them.
.lll

Here is my starting image.

The area around the nose is just a little bit too hot for my liking and as its virtually devoid of all colour and tone if I just use a simple recovery method like curves its not going to look realistic.
....n
So what can be done?
..
I'm going to use the Clone Stamp Tool and Blending Modes to get the result.


1. Press CTRL+J to duplicate your current layer (so I am not working on the original image and I can easily revert to my starting point if needed) .

2. Select the Clone Stamp Tool and change the tools Blend Mode to Multiply.

3. Change the Opacity of the Clone Stamp Tool to 20%.

4. Sample an area of skin that is not too blown out by holding down ALT, your cursor will change and click the area of skin you want to sample from.

5. Keep resampling and painting over the area you wish to fix, paint over the same area several times to change the opacity of the effect.

Here is my end result:


Article including images copyright of Gerard Foy Photography.
www.gerardfoy.com