Showing posts with label Educational. Show all posts

Wednesday, November 2, 2011

Highkey With One Light


Here is a nice little lighting setup that produces a very interesting highkey image.

Loop Lighting Pattern with Window Light as Key

There are many ways to use window light for effective portraits. The following setup will show you how to get a loop lighting pattern using window light as the key.


Thursday, October 13, 2011

Another image style using channels

This post is a slight deviation from my previous post with a different end result. For simplicity I will start at the beginning again.

1. Open your image in Photoshop.
2. Click the Channels Tab.


3. Hold down the CTRL key and single click on the RGB channel, this will load the luminosity as a selection.
4. Press the "Create New Channel" icon on the bottom of the Channels dialog - this will create a new Channel "Alpha 1".
5. Set your background colour to white and press CTRL+DEL a few times to fill the selection with white.
6. Select your brush tool and set your foreground colour to White.
7. Press CTRL+D to deselect the selection.
8. Paint white on all the areas you would like to be white in the final image.


9. Press CTRL+I to invert the channel and then double click on it to load it as a selection.


10. Select the Marque Tool from the toolbox and with the Alpha Channel selected move the selection into the new document where you want the background (you can move it when the little rectangle is displayed).

11. Create a new Layer and select a foreground colour you would like to use, I'm using a dark blue. Press ALT+DEL to fill the selection with the colour.


Wednesday, October 12, 2011

Create a High-Key Page Background

Here is a nice technique for creating a faded image for a background. This technique can be used in design when you want an image to break up a boring background or for any other reason you can think of really..

1. Open your image in Photoshop.
2. Click the Channels Tab.


3. Hold down the CTRL key and single click on the RGB channel, this will load the luminosity as a selection.
4. Press the "Create New Channel" icon on the bottom of the Channels dialog - this will create a new Channel "Alpha 1".
5. With the new Channel "Alpha 1" selected white as your background colour and press CTRL+DEL a few times to fill the selection with white.
6. CTRL+click on the Alpha Channel to load it as a selection.


7. Select the Move Tool from the toolbox and with the Alpha Channel selected move the selection into the new document where you want the background.


7 . This can also be refined a little and can produce a very nice looking black and white image by playing around with Levels or Curves.


Monday, October 10, 2011

Better Portraits

There’s more to portraiture than just pointing a camera at a person and saying smile.
When making a flattering portrait of a person, you looking to accentuate the positives and minimise the negatives.
Here are a few tips to help achieve this.

Make your subjects Slimmer
A very simple way to make someone look slimmer is with creative posing. Do not to have the person square-onto the camera because it emphasises their width. Also you do not want them side-on, which draws attention to any "protruding parts".
Instead place them at an angle to the camera and have them standing rather than sitting, which also prevents the body slumping down.
If they are sitting, have them sit at an angle to the camera and use the hands and arms to cover body parts like their stomach.

Reduce Ear Size
When photographing someone with ears that are too large or protrude, do not photograph them from straight on as this will make the ears very visible.
Pose them at an angle that is three-quarters to you, so that one ear is hidden. Then make sure the person is facing the light in such a way that the exposed ear is in shadow.

Give Stature
If someone is below average height and you want to make them look taller, shoot from a slightly lower angle.

Large Nose
To reduce the size of a large nose shoot them from a slightly higher angle to help reduce its size. Another method would be to take a lens with a long focal length (from around 100mm up), this will help flatten the nose if its long.
If you do photograph a person with a long nose from an angle do not let the nose line break the line on of the far cheek.
Lighting can also help reduce the apparent size of the nose. Use butterfly lighting (placing the main light straight in line with the direction the face is pointing and slightly higher than the face 25-75 degrees) or loop lighting (placing the main light above the face 25-60 degrees and somewhat to the right or left of the of the direction in which the face is pointing) and in both cases keep the light source soft to avoid harsh shadows and if your subject is a male with protruding ears and short hair Butterfly lighting is best avoided.

Reduce a Double Chin to a Single Chin
To help reduce a sagging chin use a camera angle that is slightly above the line of the cheek and ask the sitter to raise their neck and lean it forward slightly, this will help tighten the skin and pull the chin in.

Help reduce Thinning hair and Baldness
To help reduce thinness on top use a camera angle that is slightly below eye height and/or have the subject tip his head up slightly.
Try to keep the amount of light hitting the top of the head to a minimum and definitively avoid using light sources directly over head (so bouncing the flash off the ceiling is probably best avoided in this situation).

Photographing Subjects with Glasses
Have your subject tilt their head a little or to tilt their glasses forward to reduce reflections coming back into your camera lens. Get them to lean forward, with their arms resting on a table or the back of a chair.
chair.

So next time you are going to take a portrait of someone, just stop for a second and try to think how can I make a more flattering result for my subject.They will thank you for it later.

Wednesday, October 5, 2011

Removing Colour Cast with LAB Colour Mode


LAB Colour mode is a great way to fix a color cast and/or to adjust the luminance in an image.
Follow this step by step guide to try it out.

1. Open your image in Photoshop.
2. Duplicate the image by clicking the Image menu - Duplicate
3. Convert the image to LAB Colour by clicking the Image menu - Mode - LAB Colour
4. If your layers panel is not displayed press F7 to display it.
5. Add a new adjustment layer by clicking the Layers menu - New Adjustment Layer - Levels.

6 . You will see 3 options in the levels dialog - Lightness, a, b

Just a quick Note, I find it helps to start with an end goal in mind before playing with the colours.
  • Lightness - This option does not control the colour but is used to change alter the luminosity in an image. Dragging the slider on the far left (your left) in makes the blacks lighter. Dragging the slider on far right (your right) in makes the whites lighter. Dragging the central slider to the left makes the midpoint darker and to the right makes the midpoint brighter.
  • a (Red - Green) - This option adjusts the Red - Green channels within an image and operates on the same principle as the Lightness Slider above.
  • b (Blue - Yellow) - This option adjusts the Blue - Yellow channels within an image and operates on the same principle as the Lightness Slider above.
7. Once happy with the colour and luminosity changes flatten the image by clicking the Layer menu - Flatten Image.
8. Change the image back to RGB Colour by clicking the Image menu - Mode - RGB Colour
9. At the point I select the whole image, copy it and paste as a new layer in my original as I may reduce the opacity of the LAB adjustment.

Types of Light

There are different types of natural light available to the photographer. Each type of light will produce different results. Knowing and understanding the light you are dealing with will help you achieve better results.

Harsh Light
Found on bight sunny days, when the sun is high in sky.

- This type of light can produce deep rich blue skys, especially when used with powerful flash lighting and under exposing the sky by a stop or two (add a warming gel to the flash and change the colour balance in photoshop to tungsten to enhance the blue even more).
- Lots of light provides the opportunity to use low ISO, small apertures and fast shutter speeds. I use these conditions to my advantage regularly when panning at motor racing events.
- Be aware of the harsh contrast in this type of light.
- Be aware of the harsh short shadows produced by this type of light, especially when photographing people. Using a reflector or fill flash will help reduce these shadows.
- Be aware bright light makes people squint, if possible turn them away from the light.
- Light in these conditions can have a blue colour cast.

Low Light
Found during early morning and late evening on bright days during the Summer months and during Winter days when the sun does not get high in the sky.

- This type of light produces long raking shadows that can give a sense of depth to a picture.
- When used side on this light is great at revealing textures.
- Be aware of the contrast in this type of light.
- Be aware this type of light is very warm and has an orange colour cast.

Diffused light
Found on days when the sun is covered by cloud (pretty common where I live).

- This type of light can help to make beautiful outdoor portraits.
- The light is soft and even, producing soft light shadows.
- People are less likely to squint under this type of light.
- You don't have to wait for overcast days for this type of light. On a sunny day stand your subject in shade (you will physically see the difference when they walk into the shade). Be careful if that shade is a tree, portraits shot underneath a green canopy will inevitably look greener than you expect, but this is easily fixed by increasing the amount of magenta in your colour balance.
- Sometimes this type of lighting condition doesn't produce enough light and you will find you have to use higher ISO, lower shutter speeds and wider apertures.

Flat Light
Found in Mist, fog and early morning.

- This type of light will soften the sharpness.
- This type of light will lower contrast.
- This type of light will help produce an image with a delicate feel to it.
- With the lower contrast and the soft light the cloud cover acts like a giant softbox and there will be little difference between exposure readings taken from sky and land. Shadows will also be very soft.

Sunday, September 5, 2010

Trip to Dingle, Co. Kerry for the Dingle Marathon


This weekend I found myself in Dingle, Co. Kerry for the Dingle Marathon. I decided to go down on the motorbike and made 860kms in two days. I'm feeling a little tender today but for the most part it was enjoyable. But I can't really complain. There were a few guys and girls running an ultra marathon, that's 50 miles!! Well done to everyone who took part but total respect to those ultra runners.


Well there was no way I traveling that distance and not getting a couple of landscapes. Its a long time since I have visited Kerry, I forgot how totally beautiful it is down there.
Here are a few photographs I took when I wasn't busy photographing runners.

Thursday, September 2, 2010

Removing Global Colour Casts

Here is a really quick tip I have just discovered for removing colour casts from a image.
1. Open your image in Photoshop and press F7.
2. Copy your layer.
3. From the Filter menu select Average, this will give you the average colour of your image.
4. Change the Blend Mode of the layer to Colour.
5. From the Image menu select Adjustment/Invert, this will give you the opposite colour.
6. Simply reduce the opacity of your colour layer until you get a colour you are happy with.

Wednesday, September 1, 2010

Natural Light Portrait

Here are two edits of a natural light image I took of my daughter in France. I positioned my daughter with the sun behind her (so I was shooting into the sun) and I had a large white wall behind me. This large wall acted as a large fill reflector filling the shadows and taking down the contrast.

I set my camera to manual exposure, set the aperture I wanted (personally I like F4 to F5.6 for portraits like this, this was shot at F4), zoomed in my camera so I was only metering for the skin on the face and changed my shutter speed until the camera meter told me the exposure was correct.


With my exposure set I was free to concentrate on composition and interaction with my daughter.
The result...a very pleasing portrait from my holidays in France.


Tuesday, May 11, 2010

How to Be a Professional Photographer

Very Funny Video...

Friday, April 2, 2010

Two for One Grunge Frames in Photoshop.

This is a great technique for adding an Grunge Frame effect to an image using Photoshop's Blend Modes. I have created the Grunge Frame used in this example and have provided it for free download below. These Grunge Frames can be anything, you can buy them or create your own like I did. You can create them in Photoshop, draw them and scan them or take pictures of textures, it really doesn't matter. The point is they can be anything once they are converted to be a black and white file.

If the file is not one you have created, then when you bring it into photoshop you need to set you white and black points on the file. To do this you need to click Image/Adjustments/Levels from the menu bar.


To set the black point click your Black Point dropper.


Select and click on a part of the Grunge Frame you want to be black.
To set the white point click your White Point dropper.


Select and click on a part of the Grunge Frame you want to be white.

Once you have your Grunge Frame ready for use you press CTRL+A to select it. CTRL+C to copy it.
Open the image you wish to use the edge file on and once it opens in photoshop paste the Grunge Frame on top of the image by pressing CTRL+V.


If the Grunge Frame is too small or too large for the image underneath then we need to change the size of the edge file. To do this press CTRL+T to bring up the free transform tool. Then drag the handles of the Grunge Frame to cover the whole of the image file. Once you get it the way you want press Enter on your keyboard.


Now all we need to change is the blend mode of the top layer to display our image underneath. As the primary colour of the Grunge File is black we want everything that is black to be ignored from the top layer. To do this select the Screen Blend Mode.


When the Blend Mode is Changed to Screen.


Pretty Cool!

But what if we want black out the outside the what on the inside? Well its very easy. Select everything in the upper layer (our edge layer) by pressing CTRL+A on the keyboard. When everything is selected press CTRL+I on the keyboard.


Again we are going to change the Blend Mode of the upper layer to ignore the white letting the image underneath appear. Set the Blend Mode of the upper layer to Multiply.


So there you have it. With every Grunge Frame you create you get one for Free, just invert the layer the change the blend mode, it couldn't be easier.

Click Here to download your free High Res Grunge Frame.


Article including images copyright of Gerard Foy Photography.
www.gerardfoy.com

Monday, March 29, 2010

Fixing Blown Highlights in Photoshop

Recovering lost highlight detail is virtually impossible in Photoshop. Here is a handy little technique to recover them.
.lll

Here is my starting image.

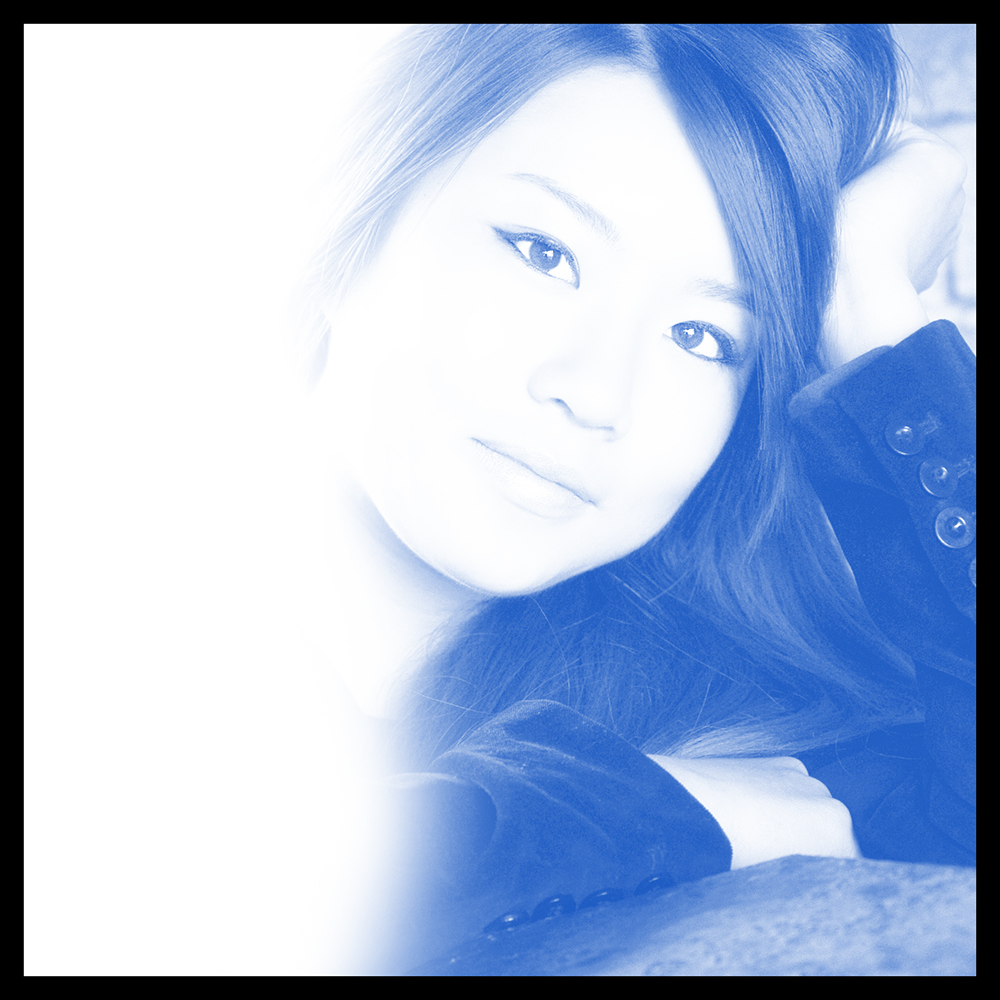
The area around the nose is just a little bit too hot for my liking and as its virtually devoid of all colour and tone if I just use a simple recovery method like curves its not going to look realistic.
....n
So what can be done?
..
I'm going to use the Clone Stamp Tool and Blending Modes to get the result.


1. Press CTRL+J to duplicate your current layer (so I am not working on the original image and I can easily revert to my starting point if needed) .

2. Select the Clone Stamp Tool and change the tools Blend Mode to Multiply.

3. Change the Opacity of the Clone Stamp Tool to 20%.

4. Sample an area of skin that is not too blown out by holding down ALT, your cursor will change and click the area of skin you want to sample from.

5. Keep resampling and painting over the area you wish to fix, paint over the same area several times to change the opacity of the effect.

Here is my end result:


Article including images copyright of Gerard Foy Photography.
www.gerardfoy.com

Thursday, March 25, 2010

Portrait in the Home for Everyone

I am going to take you through the process of how you can turn an ordinary snap into a much more professional looking portrait in the home. A little bit of equipment is required but you can use natural light to the same effect quite easily.
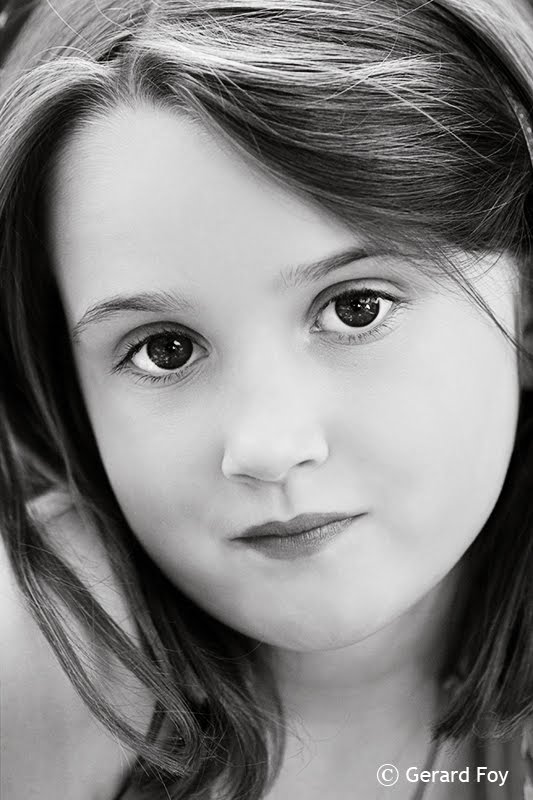
I took a photograph at every single step to building the final image so you can easily see two things.
1). A little effort can go a long way.
2). This stuff is easy.

Step 1 Compact Camera and Direct Flash


This is a look I'm sure everyone is familiar with. The problem is the flash. Its too close to the lens axis and too small. The result is flat, harsh light and maybe even a bit of red-eye thrown in to add to the disappointing result.
As I have told people in the past, if you have a camera that is fully automatic and no Hot Shoe


you are limiting the results you will end up with. There are thousands of second hand DSLR's out there on the market (I was able to find them on Ebay from €100), these cameras will take you from being a photography passenger to being a photography driver. I do recommend if you are interested in photography to go get one and start learning a little.


Step 2 Professional DSLR and Direct Flash
..

So I have changed camera. Gone is the €150 euro consumer compact and in comes the professional camera, with the professional lens and the professional flash, all costing a lot more than the little compact camera.
This is going to be great, the equipment is so much better. So put the lens and the flash on the camera, leave everything on automatic and take the photo, the camera will do it all for me.

The Result?
Not much difference between our Step 1 Compact Camera and Direct Flash example above. There is most certainly a difference and it is a step in the right direction, that can not be denied but there is so much more we can achieve when we have control and we exercise that grey matter between our ears.

Step 3 Professional DSLR and Ambient Light

So maybe our big expensive camera is not so bad after all? Are we beginning to see what the issue might be with the first two images above? What's the common element in the first two examples that's missing from this example?
If you said "the flash", well done, full marks.
Yes its the flash or to be more precise about it, its the relative position of the flash in relation to the lens axis and the apparent size of our light source in relation to our subject (don't worry about the apparent size thing for now, just know this bigger = softer and smaller = harder).

Step 4 Professional DSLR and Bounced Flash

Wow, what a big improvement on our first and second attempts with the flash and we only made one change....We took control.
So what where the steps.

1. I turned all the automatic controls on the camera and the flash off (I had actually done that in the Ambient Light Example above but forgot to mention it). This gives me Control. I am no longer letting the camera and flash make the decisions I'm telling them what to do. And as an added plus, every frame will be exposed the same as the previous frame giving me consistency.

2. I tilted my flash head up to the ceiling so its no longer pointing in the same direction as the lens. This gives me a softer light source because when that light hits the ceiling its going to spread out and bounce back down to my subject. I'm now lighting my subject with a large light source.


3. I added a fill card to the flash now to provide a little bit of directional fill. The problem with bouncing into the ceiling is that its overhead light and the problem with us humans and overhead light is that our eye sockets are receded. So when light comes from top down our eyes go in shadow and we get shadow casts under our eyes and this makes our subject look a lot less undesirable. Adding the fill card means these shadow areas now receive light and they are no longer the dark bags they once were, they look alive, they pop.


If you don't have a built in fill card then you can go to great expense buying a rubber band and a piece of paper and making one, so you have no excuse.

Step 5 Get the Flash off Camera.

I have now moved my flash off my camera and stuck it on a light stand. Once one get the flash off the camera you begin to put dimension into the subjects you photograph. The world we live in is three dimensional but a photograph is two dimensional. The only way we can express this extra dimension in photography is by using directional off axis light to sculpt our images. If you do painting or took an art class you know this already, right?
I have also added a silver brolly as a light modifier to increase the size of my light source giving me softer more flattering light. If you find this concept confusing either look at the images of my wall above again and notice how much softer the transition is between the light parts of the image and the dark parts of the image when I bounced the flash (increasing the size of the light source) and when I used direct flash (light source size about 3 or 4 inches).

Step 6 Add a Fill light to our Shadow Side.

Notice how, when we place a fill on the shadow side the shadows are softened. The fill here was simply an A3 mount board bought from an art supply shop for €4.

So there you have it. Its simple. If you don't have the flash I suggest you stick to window light. To decrease the size of the light source and have harder light use a window in direct sun light and to increase the size of the light source and have softer light use a window out of direct sun light (it will be reflected light from the clouds and your surrounding environment).

And get down to your local art store and buy yourself a white and black mount board, they make cheap reflectors, I use them all the time. The image below was shot outdoors using two of these mount boards, manual exposure and nothing else.


Article including images copyright of Gerard Foy Photography.
www.gerardfoy.com

Sunday, February 28, 2010

Different Wedding Photography Styles

Typically, your wedding day is one of the most important milestones in your life. You spend a fortune on flowers, stationery, dresses, a makeup artist, hotels and so much more. Your personality and style goes into those details. Whoever you are and what ever you like there is a wedding photographer out there for you.

Photographers come in many different personalities, sizes and styles. Some shoot in only one specific style and there are photographers who shoot in a variety of different styles. Then we have the real innovators who create their own style.

The most popular styles of wedding photography in today's market are as follows:

- Photojournalistic
- Traditional
- Illustrative

Lets take a look at each of these...

Photojournalistic
Wedding photojournalism is said to appeal to the bride and groom that require a series of unique photographs designed to "tell a story" or narrate their wedding day. Wedding photojournalism has become a very popular style of wedding photography and is the art of capturing moments unobtrusively. Normally you barely know that the photographer is there. Normally the photographer covers the wedding with a large telephoto lens (although not always) and tries not to get in the way of the story as it unfolds.

Wedding photojournalist's respond to events as they unfold, they do not manipulate or create events. The resulting images therefore can be unpredictable (as is life unpredictable), some consider this unpredictability as a drawback with this particular style. Personally I feel its not a drawback it's the beautiful aspect of this style, it really is a record of your day. The goal of Wedding Photojournalism is to tell the unique story of your wedding day. Wedding Photojournalism captures moments rather than poses, documenting the emotions and energy around the entire occasion. The images convey genuine emotion and capture the story of your day as it unfolds naturally.

Best in the world: Well for me its Jeff Ascough but many photographers will say Dennis Reggie. Dennis is the father of this style.

Read about Dennis
here.
See some images from Jeff Ascough
here.

Traditional
Traditional wedding photography is a photographic style that is a series of contrived posed or 'set up' photographs, usually of the wedding party and the couples' families. Traditional wedding photographers tend to follow a 'shot list'. Lighting and backgrounds are tightly controlled by the photographer resulting in well exposed images. The disadvantages of Traditional wedding photography could be issues like, the amount of time the Bride and Groom spend getting their photograph taken. Images can look visually pleasing but stiff due to their static and contrived nature and predictable.

The upside of traditional photography is that you end up a set of professional photographs of your family and loved ones.

Although Traditional wedding photography still has it's place in the modern photography world it is being pushed aside by more illustrative and photojournalist styles of shooting. You see more traditional photographers that are older and have been in the industry a long time and have not changed their ways or you will see it in the lower end beginners as it is any easy style of shooting that does not take much creative input. But be aware it still takes skill so don't be thinking anyone can do it well.

You probably don't want to rely too heavily on formal portraiture, however, or you will miss out on a lot of the energy, passion, and raw emotion surrounding your wedding. Most couples want to make sure to include some candid, photojournalistic photography in their wedding albums alongside the formal shots.

Best in the world: Well for me its Monte Zucker.
See some of his images
here.

Illustrative
Wedding Photographers who shoot weddings in the Illustrative style, think in terms of design elements by placing their subjects in settings of interesting composition and backgrounds. This photography is usually a creative person who loves design and elements of color and texture. The photographer provides direction to their subject but they are also encouraged to interact. This results in a more spontaneous feel. Illustrative wedding photography is said to bring out the photographer's 'artistic' creative and compositional skills rather than simply capturing a series of moments.

Its influenced by fashion, editorial and lifestyle photography.

Illustrative Wedding Photography is the newest style to break into the wedding scene. Its a modern and fun way to photograph a wedding resulting in artistic and edgy wedding images. Photographers who shoot in this style are skilled both artistically and technically.


If I was to pigeon-hole myself into one particular style it would be the category of photography best suited to me.

Best in the world: Australian photographer Yervant his website simply says "Fashion meets Wedding".

See it here.
OR
San Francisco based photographer Bambi Cantrell.

See her website here.

Article including images copyright of Gerard Foy Photography.
www.gerardfoy.com

Thursday, February 4, 2010

Natural Light Portraits in the kitchen

My wife ran out to the shop Saturday lunchtime and left us the task of setting the table. At around the same time I noticed some really harsh sunlight pouring into our kitchen. So what do you reckon I did as soon as she left?

I ran upstairs and grabbed my camera and a reflector of course. This shot took about 30 seconds and shows how easy it can be to capture a good quality image if you understand basic camera operation and you can visualise the final image.

Essentially all that was required was moving Alana far enough away from the glass doors with the sun pouring through them and meter for Alana's face (which started out darker than the sunlight and became darker the deeper she came into the room). As I'm metering for her face and as she moves into the room the darker her face gets and the greater the light intensity difference between her face and the sunlight.

I then added a hand held reflector (yes, I shot this with one hand and yes I was shaking) to fill some of the shadows on the face.

Below another edit.


Article including images copyright of Gerard Foy Photography.
www.gerardfoy.com

Wednesday, January 20, 2010

Blind Photography

This just totally opened up my mind as to how I could approach my photography. I am so obsessed with light, the lack of light and composition as I'm sure most photographers are.
So imagine taking photographs not being able to see these elements.
That's exactly what these guys are doing here:

BBC and PhotoVoice

They are getting some pretty cool results and it makes me want to explore some of my other senses and not be so one dimensional about it.

Wednesday, January 6, 2010

Very interesting video from National Geographic


“I believe that photography can make a real connection to people and can be employed as a positive agent for understanding the challenges and opportunities facing our world today.“ David Griffin

Friday, August 14, 2009

Photographing Children

The world is full of parents and other family members who take thousands of photographs of their young family members every day. For many of these people the following will apply.

They know their photography is not what it could be. They want
to take images that capture the real essence of their child but because for of a variety of reasons they are unable to capture on their camera what they visualise in their heart. Sometimes they capture a wonderful shot and wonder why they can't do this consistently. They become frustrated with themselves and they either educate themselves or eventually the camera goes into a drawer only to be taken out for family snaps and special events.

The ability to photograph children is a skill that I am very happy to say I do have. Did I always have that skill? No, I was as described above for a very long time. My camera stayed in the wardrobe in my bedroom, in its box. It wasn't until I started to educate myself did I turn myself into a photographer. It was a slow steady journey, one I am still on today. I hope I never reach the destination because I always want to improve my art. I believe with a little direction any parent with a camera can turn there photographs into something more. Its for this reason I started this blog with a series of educational posts. I want to share what I have learned and encourage people to take more photographs, better photographs and be as proud of their photographs as they are of their children.

Parents and other close family members are often in the best position to capture expressions of their child. They are totally relaxed in their presence, they know them, there is no defense mechanism on the part of the child. What you get is the real inner child.

Over the next few weeks I will be putting together a number of posts to help people produce more professional looking images of children. The high level list at the moment comprises of:

1. Planning your Shoot
2. Camera Position
3. Composition
4. Backgrounds
5. Exposure
6. Lighting
7. Capturing natural images
8. Basic Photoshop

Article including images copyright of Gerard Foy Photography.
www.gerardfoy.com