 I am going to take you through the process of how you can turn an ordinary snap into a much more professional looking portrait in the home. A little bit of equipment is required but you can use natural light to the same effect quite easily.
I took a photograph at every single step to building the final image so you can easily see two things.
1). A little effort can go a long way.
2). This stuff is easy.
Step 1 Compact Camera and Direct Flash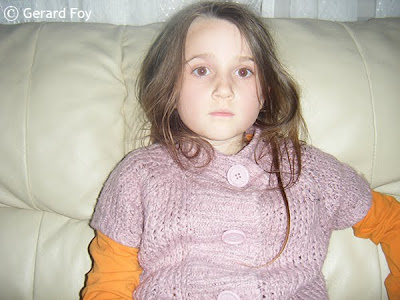
This is a look I'm sure everyone is familiar with. The problem is the flash. Its too close to the lens axis and too small. The result is flat, harsh light and maybe even a bit of red-eye thrown in to add to the disappointing result.
As I have told people in the past, if you have a camera that is fully automatic and no Hot Shoe
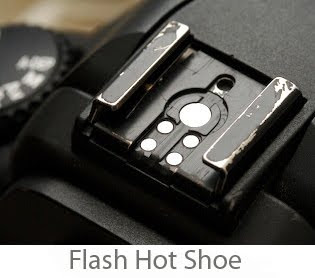
you are limiting the results you will end up with. There are thousands of second hand DSLR's out there on the market (I was able to find them on Ebay from €100), these cameras will take you from being a photography passenger to being a photography driver. I do recommend if you are interested in photography to go get one and start learning a little.
Step 2 Professional DSLR and Direct Flash..
So I have changed camera. Gone is the €150 euro consumer compact and in comes the professional camera, with the professional lens and the professional flash, all costing a lot more than the little compact camera. This is going to be great, the equipment is so much better. So put the lens and the flash on the camera, leave everything on automatic and take the photo, the camera will do it all for me. The Result?Not much difference between our Step 1 Compact Camera and Direct Flash example above. There is most certainly a difference and it is a step in the right direction, that can not be denied but there is so much more we can achieve when we have control and we exercise that grey matter between our ears.Step 3 Professional DSLR and Ambient Light
 So maybe our big expensive camera is not so bad after all? Are we beginning to see what the issue might be with the first two images above? What's the common element in the first two examples that's missing from this example?If you said "the flash", well done, full marks.Yes its the flash or to be more precise about it, its the relative position of the flash in relation to the lens axis and the apparent size of our light source in relation to our subject (don't worry about the apparent size thing for now, just know this bigger = softer and smaller = harder).Step 4 Professional DSLR and Bounced Flash
 Wow, what a big improvement on our first and second attempts with the flash and we only made one change....We took control.So what where the steps.1. I turned all the automatic controls on the camera and the flash off (I had actually done that in the Ambient Light Example above but forgot to mention it). This gives me Control. I am no longer letting the camera and flash make the decisions I'm telling them what to do. And as an added plus, every frame will be exposed the same as the previous frame giving me consistency.2. I tilted my flash head up to the ceiling so its no longer pointing in the same direction as the lens. This gives me a softer light source because when that light hits the ceiling its going to spread out and bounce back down to my subject. I'm now lighting my subject with a large light source.
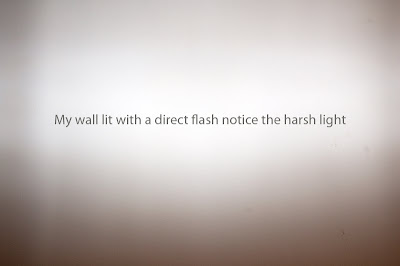
 3. I added a fill card to the flash now to provide a little bit of directional fill. The problem with bouncing into the ceiling is that its overhead light and the problem with us humans and overhead light is that our eye sockets are receded. So when light comes from top down our eyes go in shadow and we get shadow casts under our eyes and this makes our subject look a lot less undesirable. Adding the fill card means these shadow areas now receive light and they are no longer the dark bags they once were, they look alive, they pop.
 If you don't have a built in fill card then you can go to great expense buying a rubber band and a piece of paper and making one, so you have no excuse.Step 5 Get the Flash off Camera.
 I have now moved my flash off my camera and stuck it on a light stand. Once one get the flash off the camera you begin to put dimension into the subjects you photograph. The world we live in is three dimensional but a photograph is two dimensional. The only way we can express this extra dimension in photography is by using directional off axis light to sculpt our images. If you do painting or took an art class you know this already, right?I have also added a silver brolly as a light modifier to increase the size of my light source giving me softer more flattering light. If you find this concept confusing either look at the images of my wall above again and notice how much softer the transition is between the light parts of the image and the dark parts of the image when I bounced the flash (increasing the size of the light source) and when I used direct flash (light source size about 3 or 4 inches).Step 6 Add a Fill light to our Shadow Side.
 Notice how, when we place a fill on the shadow side the shadows are softened. The fill here was simply an A3 mount board bought from an art supply shop for €4.So there you have it. Its simple. If you don't have the flash I suggest you stick to window light. To decrease the size of the light source and have harder light use a window in direct sun light and to increase the size of the light source and have softer light use a window out of direct sun light (it will be reflected light from the clouds and your surrounding environment).And get down to your local art store and buy yourself a white and black mount board, they make cheap reflectors, I use them all the time. The image below was shot outdoors using two of these mount boards, manual exposure and nothing else.
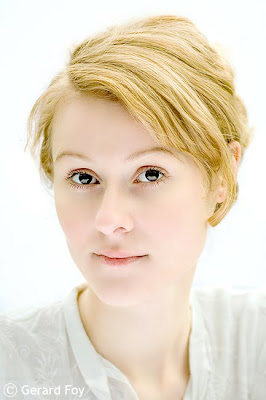
Article including images copyright of Gerard Foy Photography.
www.gerardfoy.com


 The Loughshinny Motor Cycle Supporters Club are delighted to announce a new sponsor for the 2010 season.
 To qualify riders must compete in both events. Points will be awarded to the top 10 riders in the 600cc Championship race, the Open Championship Race and the Grand Final at both events.
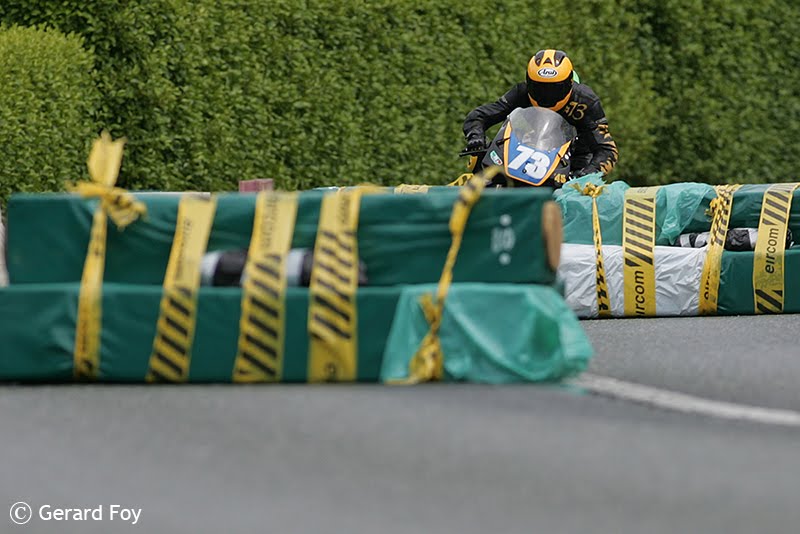 The cumulative totals will be calculated and the 3000 Euro prize fund will be shared between the top three riders, the ‘best of the best’ who have accumulated the most points over the 6 races.
 Loughshinny Motor Cycle Supporters Club Ltd


 The area around the nose is just a little bit too hot for my liking and as its virtually devoid of all colour and tone if I just use a simple recovery method like curves its not going to look realistic.
 I am going to take you through the process of how you can turn an ordinary snap into a much more professional looking portrait in the home. A little bit of equipment is required but you can use natural light to the same effect quite easily.


 The Result?
 So maybe our big expensive camera is not so bad after all? Are we beginning to see what the issue might be with the first two images above? What's the common element in the first two examples that's missing from this example?
 Wow, what a big improvement on our first and second attempts with the flash and we only made one change....We took control.


 I have now moved my flash off my camera and stuck it on a light stand. Once one get the flash off the camera you begin to put dimension into the subjects you photograph. The world we live in is three dimensional but a photograph is two dimensional. The only way we can express this extra dimension in photography is by using directional off axis light to sculpt our images. If you do painting or took an art class you know this already, right?
 Notice how, when we place a fill on the shadow side the shadows are softened. The fill here was simply an A3 mount board bought from an art supply shop for €4.